Whether you're crafting a GUI calculator with Tkinter or animating turtles across your screen, PyCharm is an excellent playground for building and managing Python projects. This guide walks you through setting up your first Python project in PyCharm—from installation to execution.
Step 1: Install PyCharm
Before you start, ensure you have PyCharm installed. Here's how:
- Head over to JetBrains PyCharm
- Choose Community Edition (free) or Professional Edition (paid with extra features)
- Download the installer based on your OS and follow the setup wizard
Step 2: Create a New Project
Once installed, launch PyCharm and create a new project:
- Open PyCharm, then click New Project from the welcome screen
- Choose the location for your project folder
- Select the Python interpreter:
- Either use an existing interpreter or click Add Interpreter
- Recommended: Create a virtual environment for project isolation
Step 3: Configure Virtual Environment (Optional but Recommended)
Virtual environments help keep dependencies clean and manageable.
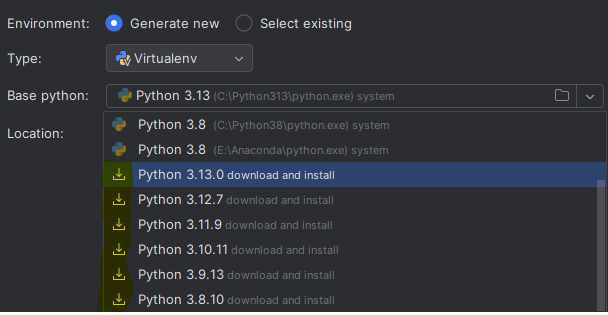
If you’re creating a new interpreter:
- Choose New Environment using Virtualenv
- Set the base interpreter (usually your system Python)
- If none is installed, the dropdown will display a download icon like so:
- PyCharm will automatically configure the environment
Now you have an isolated workspace—perfect for experimenting!
Step 4: Create Your Python File
Now let’s add some code:
- Right-click the project folder in the left panel
- Go to New → Python File
- Name your file (e.g.,
main.py) and hit Enter - Start coding!
print("Hello, PyCharm!")
Click the green play button ▶️ to run your script.
No comments:
Post a Comment